Your project’s production stage has finally ended, and the footage has just been successfully ingested. This mountain of footage contains scenes from every angle, countless camera shakes, and other unusable material. Your job as a film editor is to make sense of all this chaos and turn it into a beautiful story. Some of the benefits rough cuts bring to this workflow include the following:
- Seeing the whole story for the first time.
- Setting up the story structure and testing your editing approach.
- Identifying the parts of the story that will require more work than others.
- Identifying potential plot holes and finding a way to close them.
- Potentially recognising the need for additional footage.
In most cases, the editor creates rough cuts at the beginning of the film editing process, using their preferred NLE. This approach can be significantly improved by introducing a tool like the Media Library with an integrated Rough-cut Editor.
Media Library
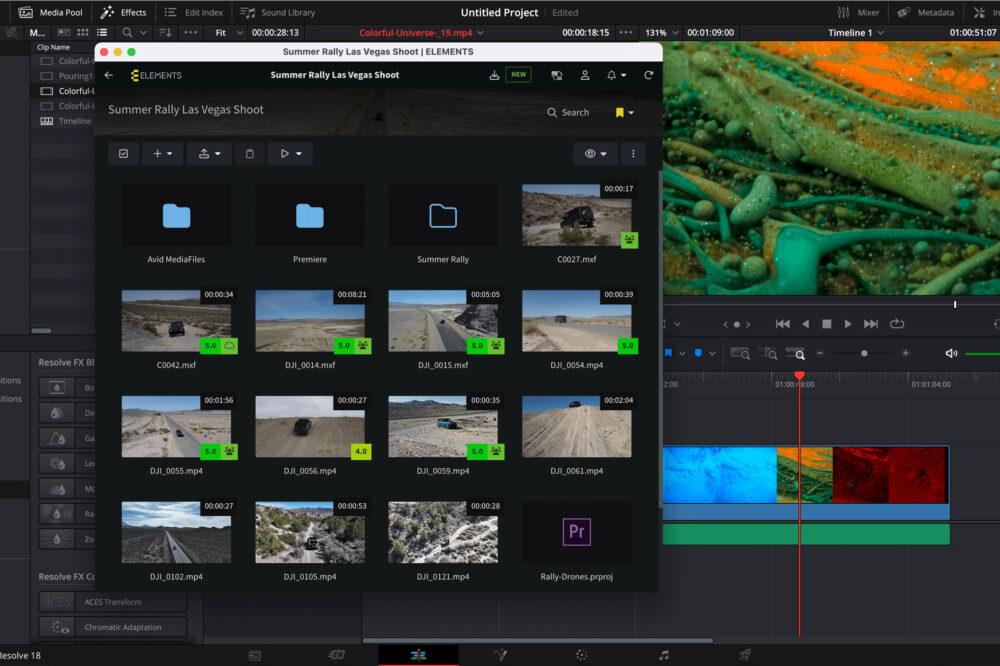
The browser-based Media Library displays your content, regardless of whether it’s stored in your server room or the cloud. It provides your team with various collaboration features and allows you to build a robust, searchable media platform. Media Library also comes with a powerful sharing feature that lets users share their footage without it ever having to leave the company.

The Media Library comes with no per-user licensing and can be accessed from anywhere in the world through a simple web browser. Check out this blog in which the sharing feature of the Media Library is examined in detail.
The Rough-cut Editor
Integrated into the Media Library, the Rough-cut Editor allows you to create whole editing timelines in just a few clicks. Your project can contain any number of sequences, and the timeline can have any number of video tracks.

This browser-based editor is easy to use and functions in much the same way as Adobe Premiere Pro and Avid Media Composer, however, with no per-user licensing. Add clips to the timeline via drag-and-drop or use the Ripple and Overwrite Insert functions. Trim the clips by using the familiar Ripple and Roll edit.

The Rough-cut Editor also supports common NLE keyboard shortcuts:
- Space, K, 5: Play and pause the selected video
- J: Jumps 10 frames back.
- L: Changes the playback rate.
- I: Sets the in mark.
- O: Sets the out mark.
Benefits to Your Workflow
The ELEMENTS Rough-cut Editor opens several unique possibilities for your workflow.
-
- Easier to use than an NLE – The Rough-cut Editor has been designed to be intuitive and straightforward, even for users unfamiliar with professional editing applications.
- No per-user licenses – The Media Library and the Rough-cut Editor can be used by any number of users. Allowing for maximum flexibility in scaling your projects.
- Great integration with popular NLEs – Access all your footage and rough cuts straight from Premiere Pro and DaVinci Resolve using the ELEMENTS Panel plugin. Importing rough cuts into Avid Media Composer can quickly be done via the AAF and EDL export feature.
- Game-changing proxy workflow – The ELEMENTS Panel allows you to reuse Media Library’s preview proxies for offline editing. You will never have to struggle with playback performance or wait for the NLE to create editing proxies.
- Keep the comments – When importing footage and rough cuts into your favourite NLE, all comments made in the Media Library will also be imported. Allowing for efficient footage logging and communication with the editor.
- Share the progress – Use the Share function to easily send preview links for your rough cuts, footage or even folders to anyone inside or outside of your organisation. You can even choose which recipient can use which functions of the Media Library.
- Doesn’t require a powerful computer – Since the editing takes place on your ELEMENTS system, users do not need a powerful computer to use the Editor. Any laptop with a web browser will do the trick.
- Optimised for remote workflows – A modest internet connection is all that you need to create rough cuts from anywhere you like.
Want to find out more? Check out this detailed blog post: Examining the Media Library’s Rough-cut Editor


