No other effect in filmmaking has proven to be as simple and as fruitful as slow motion. It allows the viewer more time to observe and digest the finer details of a movie whilst heightening the dramatic impact of a scene.
Slow motion requires planning, as the footage needs to be recorded at framerates higher than those of the final movie. In order to achieve a 50% speed in a 24 FPS project, the footage would need to be recorded in at least 48 FPS. However, sometimes the need for slow motion may only become apparent during post-production, and slowing 24 FPS video down to 50% will make it extremely choppy and have a negative effect on the overall viewing experience. The solution here is frame interpolation using DaVinci’s Neural Engine.
The following videos have been shot in 25 FPS and slowed down by 50%. The right video has frame interpolation applied to it and results in a far smoother looking playback.
Frame Interpolation
Just about every modern NLE handles mixed framerates quietly, often without the user even knowing it. For example, any time you put a clip into a sequence with a higher framerate, the NLE will automatically stretch the clip to the framerate of the sequence and add the missing frames. These added frames are usually just copies of the nearest frames as this process requires the least amount of processing power. But DaVinci Resolve also provides the frame interpolation features which generates missing frames by merging adjacent frames or by using DaVinci Neural Engine AI to analyse surrounding frames and predict motion.
Here are the straightforward instructions on achieving smooth slow motion with standard framerate footage:
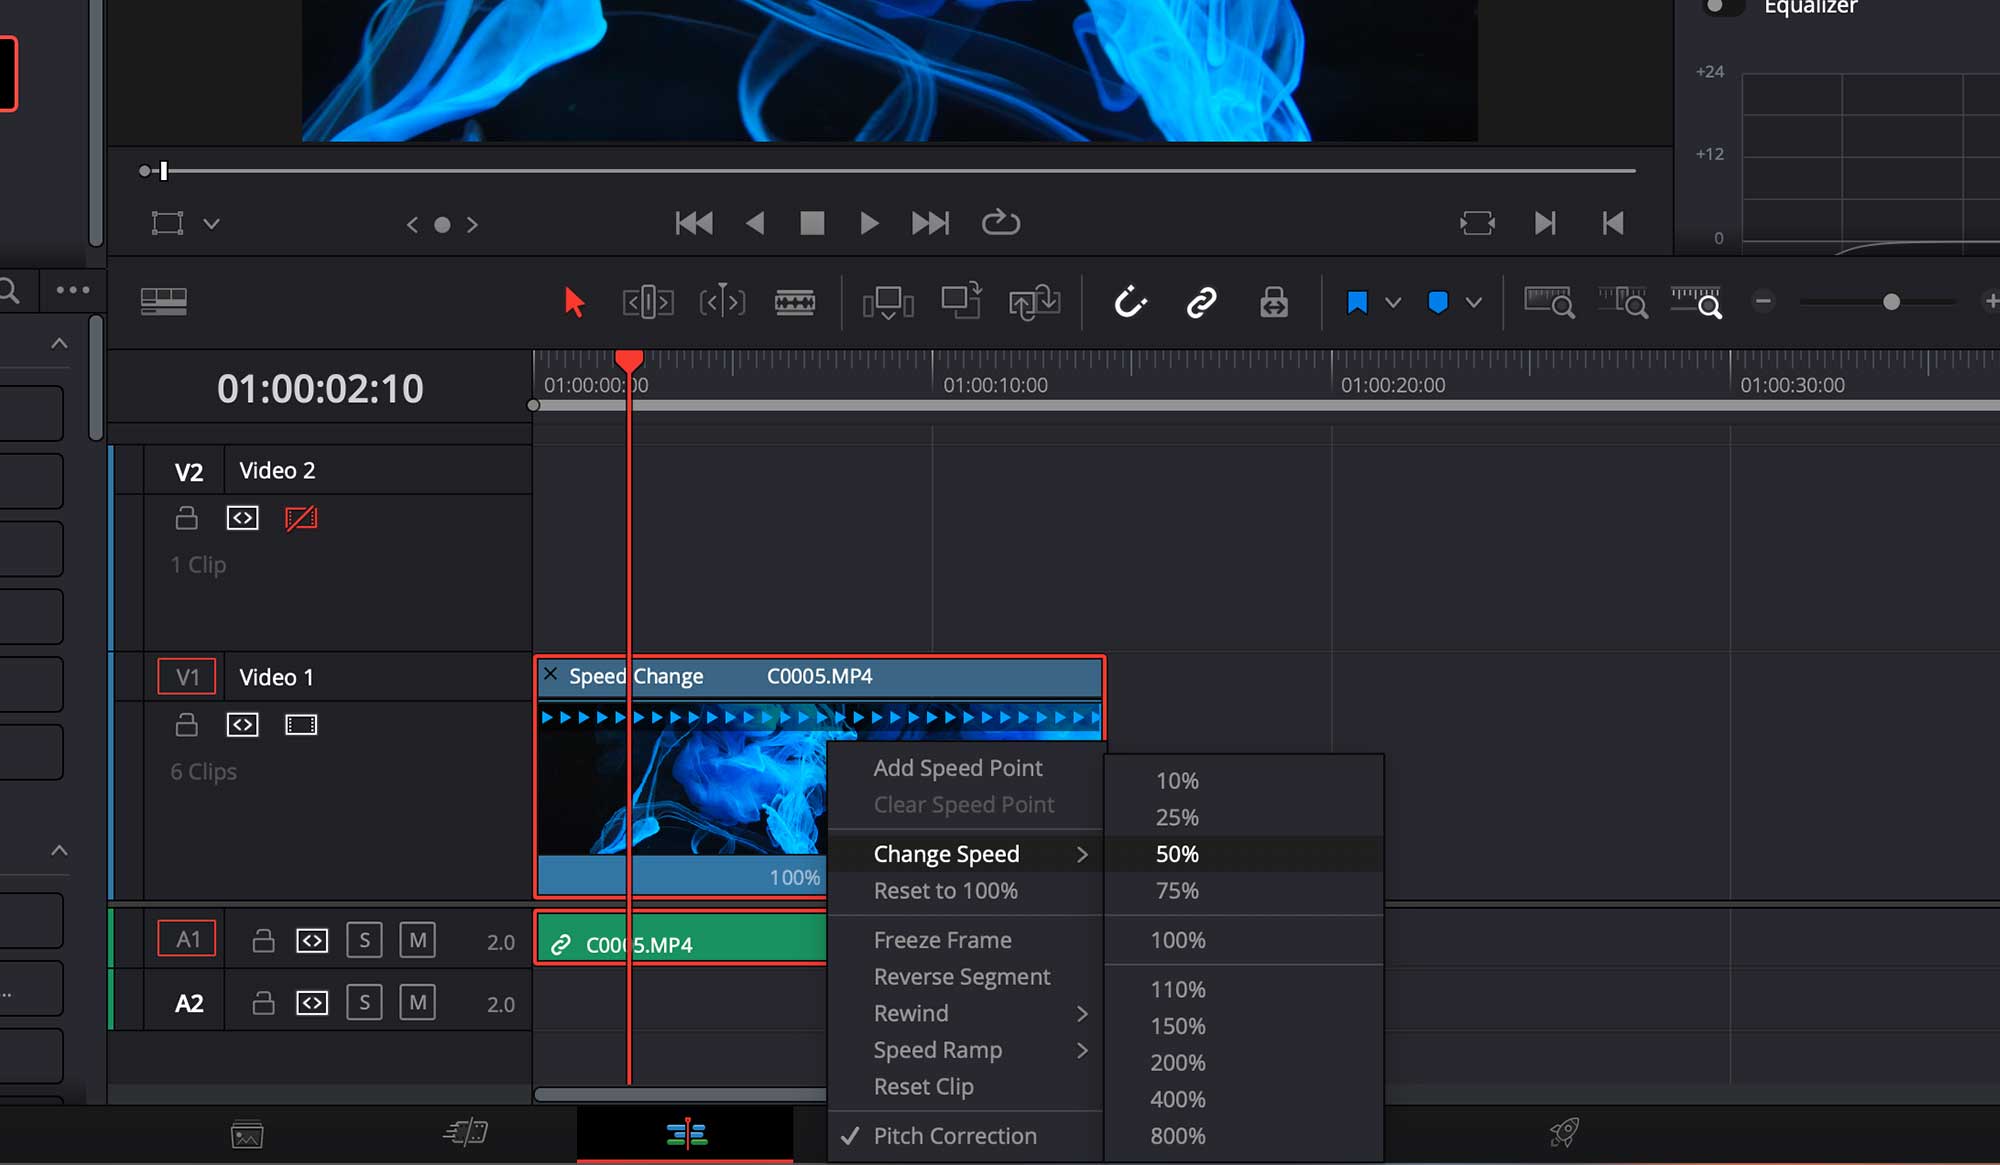
- First you need to change clip speed. Right-click the clip in the timeline and open Retime Controls or simply mark the clip and use the shortcut Cmd+R on Mac or Ctrl+R on Windows.
- Open the Speed dropdown menu on the clip and lower the clip speed – in the case of the test clip, 50% was selected. Alternatively, Speed Points can be added to dynamically change the clip speed.
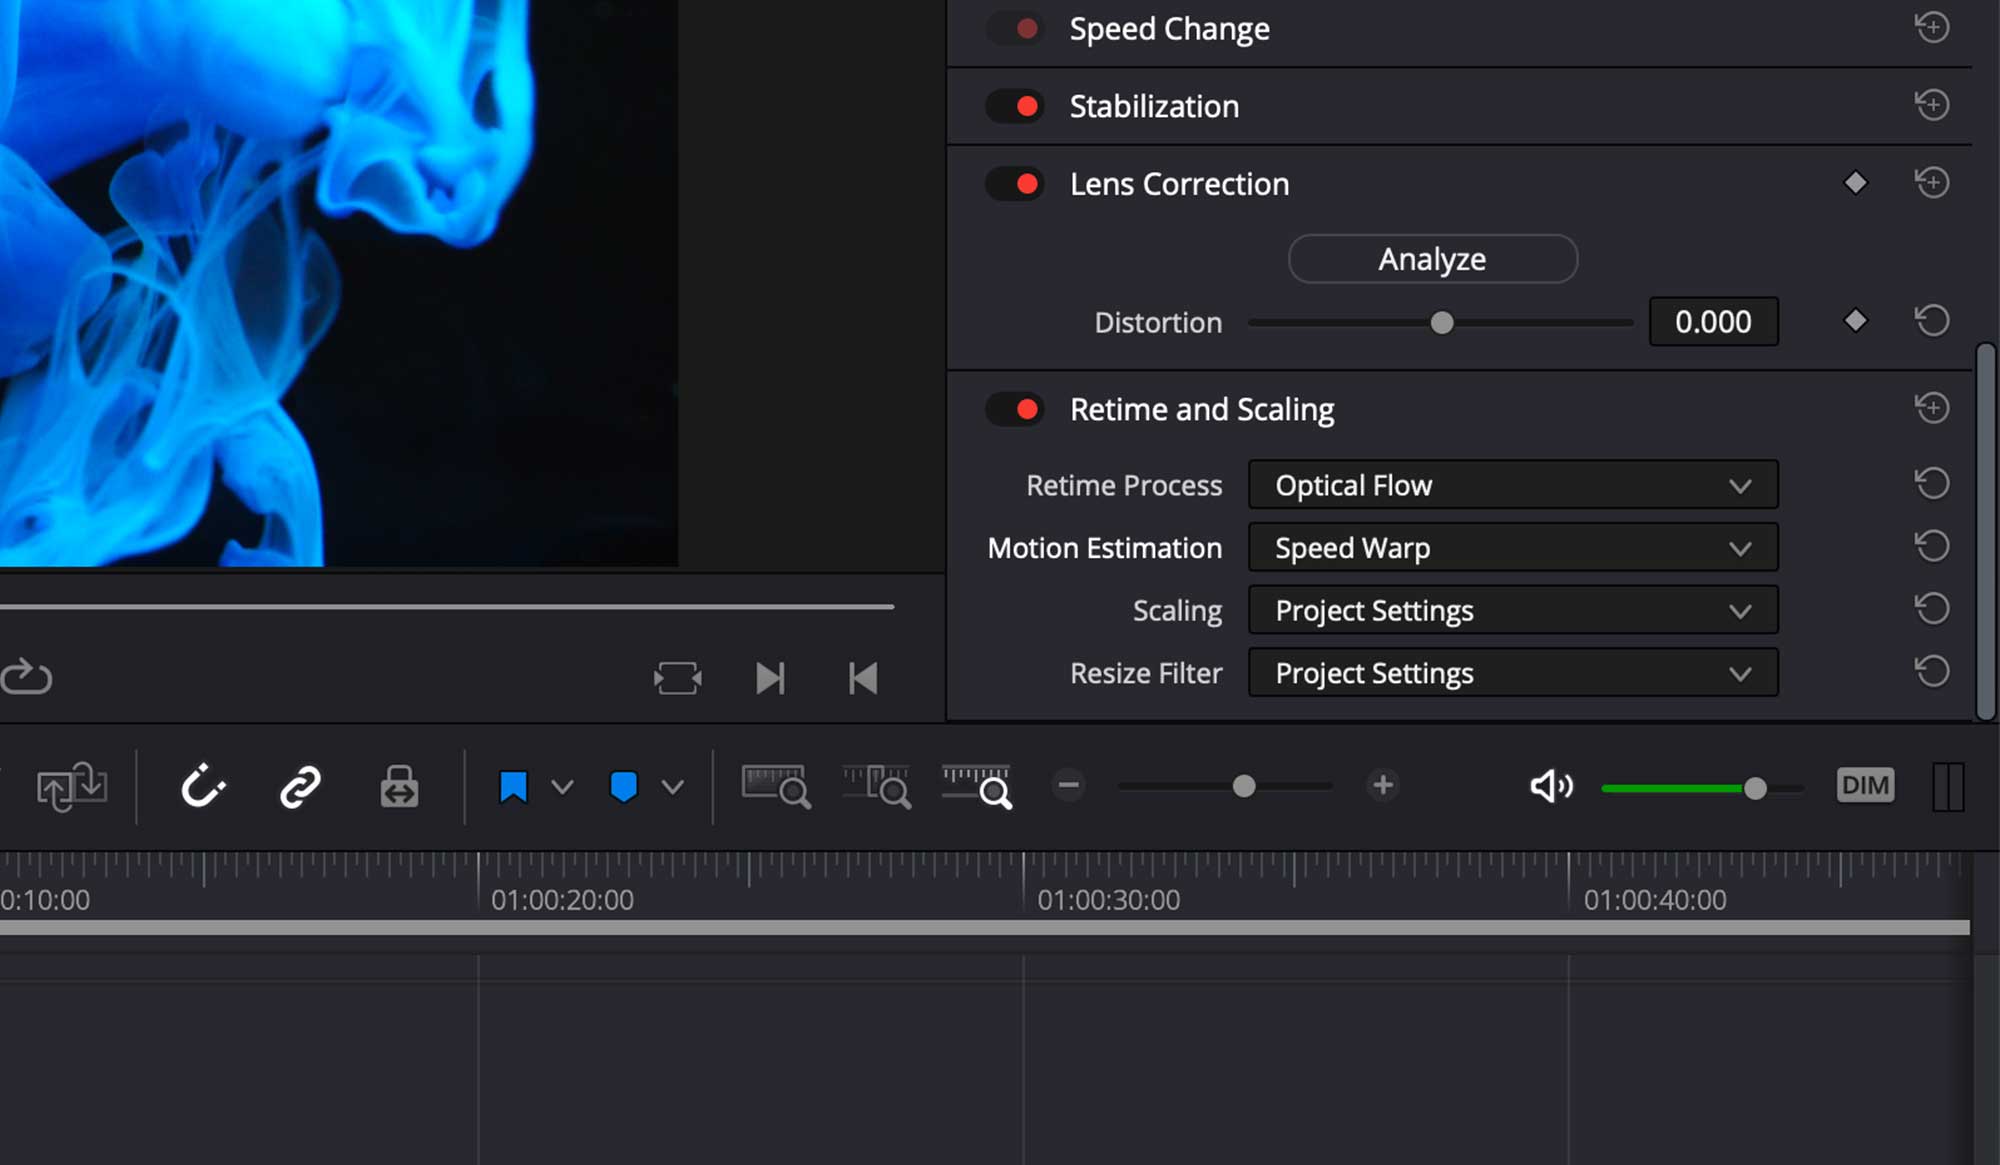
- Select the clip and navigate to the Retime and Scaling menu in the Inspector panel.
- In Retime Process dropdown, choose Optical Flow, and for Motion Estimation choose Speed Warp. Only these settings will make use of the DaVinci Neural Engine and tend to produce the best results, however, at the cost of being very processing-intensive. All details about the settings and the alternatives can be found below.
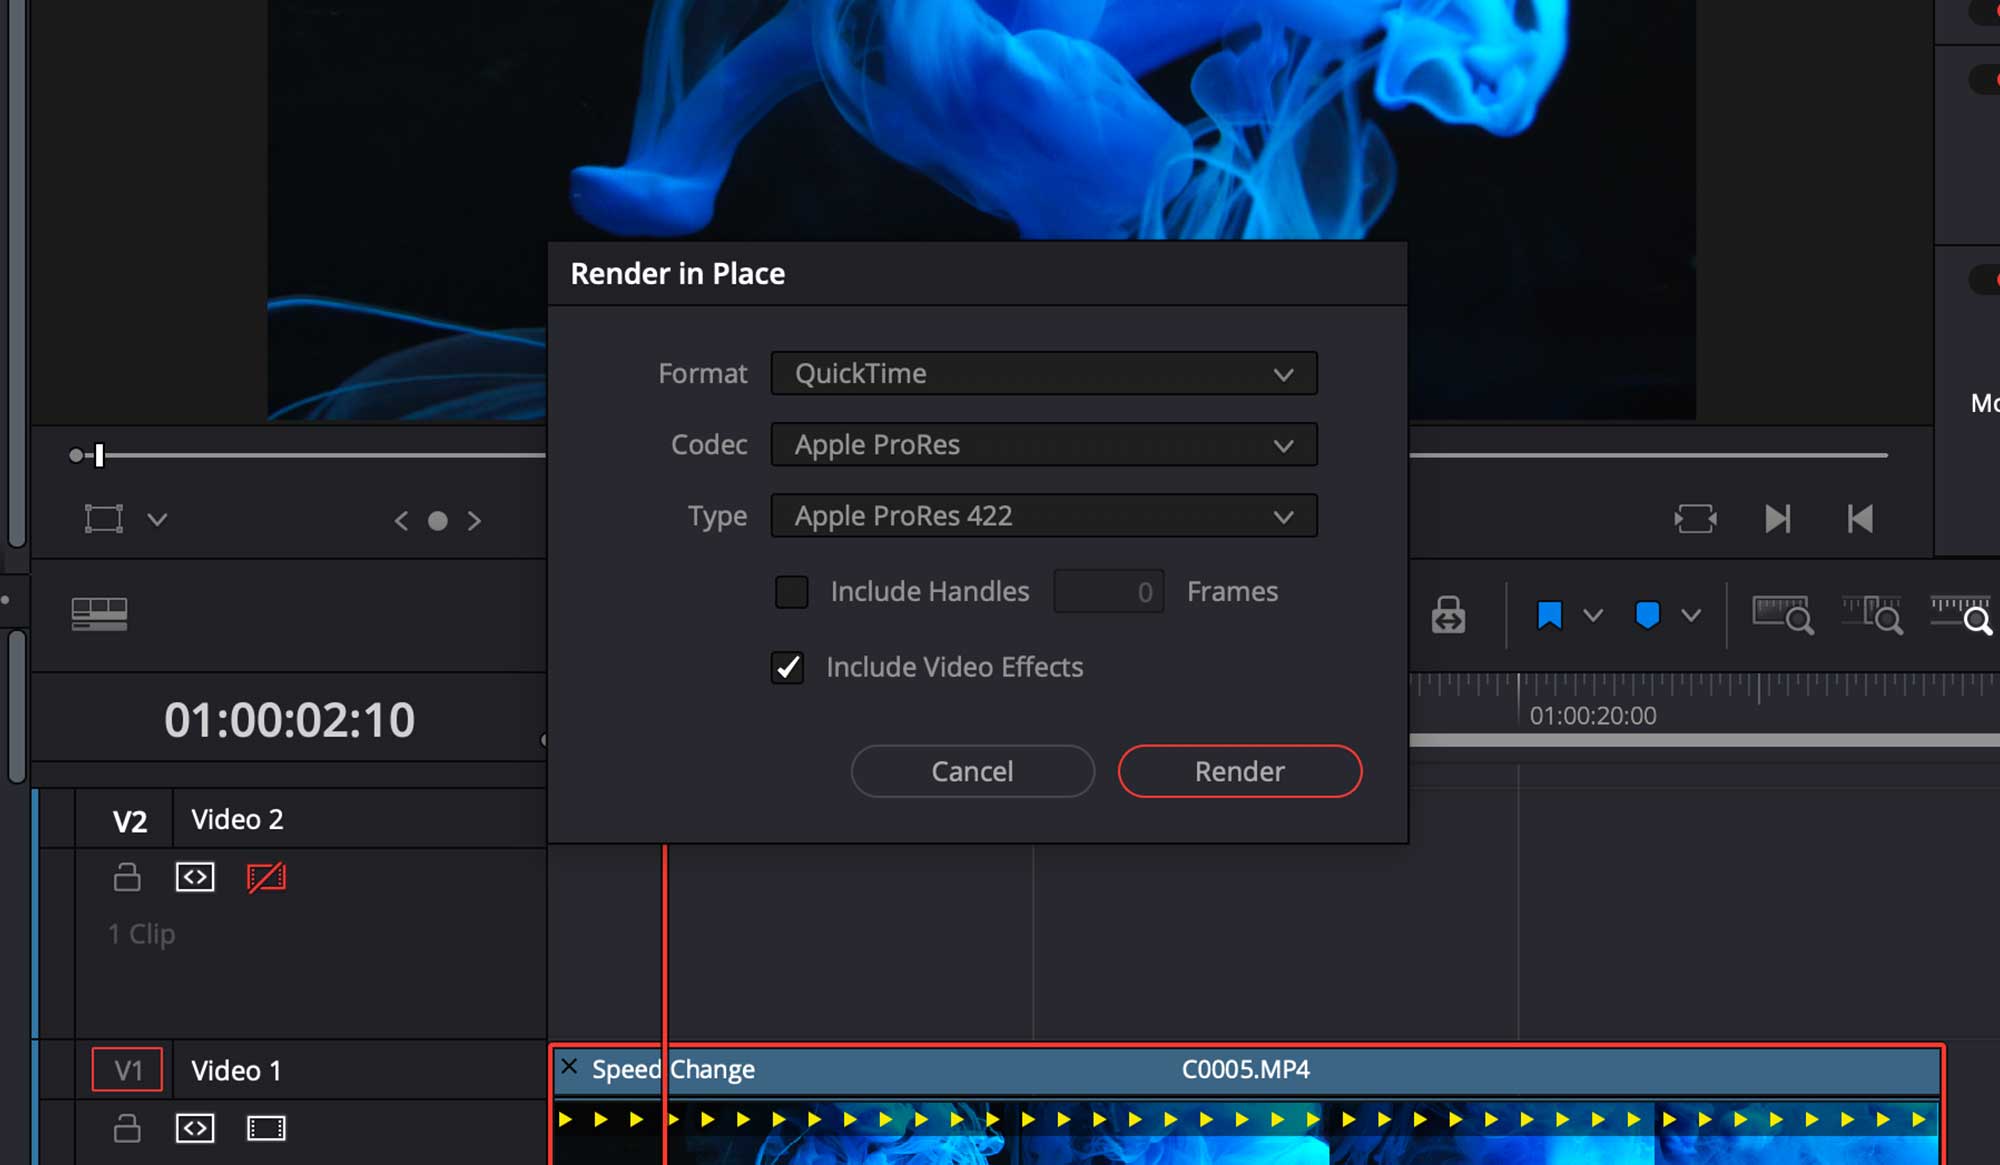
- Playback of the clip is not possible without rendering it first. Right-click the clip and choose Render in Place. Select the desired format and codec, turn Include Video Effects on and render the clip.
Expect the rendering process to take a while due to the processing-intensive retime settings. After the render has finished, a new clip will be added to the Media Pool and the clip in the timeline will be replaced by the new one.
Retime Process
Resolve gives users control over how the frame interpolation should be done. Different interpolation settings produce different quality results. The Retime Process comes with three presets, as described in the DaVinci Resolve 17 Manual:
- Nearest: The most processor efficient and least sophisticated method of processing; frames are either dropped for fast motion, or duplicated for slow motion.
- Frame Blend: Also processor efficient, but can produce smoother results; adjacent duplicated frames are dissolved together to smooth out slow or fast motion effects. This option can provide better results when Optical Flow displays unwanted artefacts.
- Optical Flow: The most processor intensive but highest quality method of speed effect processing. Using motion estimation, new frames are generated from the original source frames to create slow or fast motion effects. The result can be exceptionally smooth when motion in a clip is linear. However, two moving elements crossing in different directions or unpredictable camera movement can cause unwanted artefacts.
Motion Estimation mode
As described in the DaVinci Resolve 17 Manual: When using Optical Flow to process speed change effects or clips with a different frame rate than that of the Timeline, the Motion Estimation pop-up lets you choose the best-looking rendering option for a particular clip. Each method has different artefacts, and the highest quality option isn’t always the best choice for a particular clip. There are several options.
- “Standard Faster” and “Standard Better” are the same options that have been available in previous versions of DaVinci Resolve. They’re more processor-efficient and yield good quality that are suitable for most situations.
- “Enhanced Faster” and “Enhanced Better” should yield superior results in nearly every case where the standard options exhibit artifacts, at the expense of being more computationally intensive, and thus slower on most systems.
- “Speed Warp” is available for even higher-quality slow motion effects using the DaVinci Neural Engine. Your results with this setting will vary according to the content of the clip, but in ideal circumstances this will yield higher visual quality with fewer artifacts than even the Enhanced Better setting. This setting is only available on a clip-by-clip basis; it’s not available in the Project Settings.
Struggling with the performance in DaVinci Resolve? Read this blog about 5 ways to achieve better playback performance.