There really isn’t another company that is as heavily involved in media content creation as Adobe are. Adobe have over the years, developed not just great graphics editors but a wide range of media creation tools perfectly suited to almost every kind of creative project. Programs from Adobe’s creative toolbox are now seen as industry standard with the company’s wide range of applications benefiting a diverse and broad section of creative professionals daily. Many Adobe users discover their passion for video editing through Premiere Pro, which is the company’s flagship Non-linear editing system (NLE). In contrast to still picture manipulation, working with video requires substantial technical knowledge as well as a solid grasp of data management. Both of these subjects are vast enough for an article a piece, but here we will only brush the surface in slight detail.
Start with the system
The first thing to consider whilst experiencing any Premiere Pro issues is to check if your system is setup correctly, so that it can provide the most suitable environment to run the program in. Generally speaking, it is important that your editing workstation has enough RAM and at least a powerful CPU. A powerful graphics card is recommended and could help speed up the program. Make sure to run appropriate drivers (in most cases the latest version) to support the hardware of your editing client. Read full Premiere Pro system requirements here.
A simple reboot of the client can solve a multitude of problems, especially if the computer has not been shut down for long periods of time. One of the main culprits for the degradation of Premiere Pro’s performance over time is too little RAM at the program’s disposal.
Running Windows Firewall, Windows Defender or other anti-virus software on your editing clients can have negative impact on the client’s performance. Therefore, the most common recommended course of action is to disable these services altogether whilst restricting Internet access to the editing clients.
It is important to have the time on your storage and the clients synched up. In the Maintenance tab in the ELEMENTS Web UI, an NTP server of your choosing can be added. Your ELEMENTS system can easily offer time synchronisation to all clients.
Premiere settings
Premiere Pro performance issues can also be the result of settings within the program itself. Altering these settings does not always guarantee a heightened performance of Adobe Premiere Pro, but it can still be with trying some Changes now and again.
Turn on GPU acceleration – In File/Project Settings/General, a Video Rendering and Playback engine can be selected. If your workstation incorporates an AMD GPU, select OpenCL rendering, select CUDA if using a Nvidia GPU. Using the GPU acceleration is recommended because it helps to relive CPU’s processing workload by partially sending it to the GPU. Therefore, it will improve playback performance and rendering speed, as well as allowing real-time playback of certain effects. Even though GPU Acceleration can greatly improve Premiere Pro’s performance, it is not necessary to run the program. If turning it off helps with your problems then consider updating your GPU drivers.
Increase RAM at Premiere’s disposal – this can be done in Edit/Preferences/Memory by decreasing the amount of memory allowed for all applications other than those from Adobe. In the selection field underneath, make sure that the rendering is optimised for performance.

Media cache management – to speed up work with imported clips, Premiere Pro creates cache files. Being that these files are being referenced constantly, it is recommended to keep them on a separate SSD than your OS and your Premiere project if possible. In an ELEMENTS shared storage environment, we recommend placing media cache files onto a dedicated SSD volume that every editor will have access to. The location of the Media Cache folder can be set in Edit/Preferences/Media Cache. Here, automatic deletion of the cache files can be setup. The files can be deleted after a certain time period or the oldest files overwritten after the cache reaches set size. No media files will be lost by deleting Media Cache Files.
Disable Peak files – When importing clips, Premiere Pro automatically generates peak files and stores them together with the cache files. These files hold audio waveforms of individual clips and can have a negative impact on the programs performance and they can take a long time generate. If you can do without audio waveform, you can turn off peak file generation in Preferences/Audio by unchecking Automatic audio waveform generation.
Reset Premiere Pro user preferences and plugin cache – This easy step can fix a wide range of issues and glitches. Whilst starting Premiere Pro, simply hold Shift + Alt on a Windows client or Shift + Option on a Mac and confirm the action when prompted.
DisableMercury Transmit–Mercury Transmit allows you to transmit the picture from your program monitor to an external monitor or TV without using additional hardware. If you are not using an external preview monitor, disabling this feature may help with your performance issues without losing functionality in Premiere Pro.
Question your plugins – It is always a good idea to install only the essentials on your editing client, as anything new can introduce new issues to the system. Plugins are no different. Keep that in mind and try solving the issues by deinstalling recently added plugins.
Codecs
Codecs play a huge role in video editing. In order to lower the bit rate and thereby the clips file size, compressed codecs employ and combine mainly two different techniques – Intra-frame and Inter-frame coding. Intra-frame codecs lower the bitrate by compressing individual video frames. These are the codecs like ProRes, DNxHD/HR and AVC-Intra. Intra-frame codecs are best suited for editing but carry two main disadvantages: Typically, only professional equipment can encode them, and the resulting files are still very large. Inter-frame coding on the other hand describes a process of comparing and referencing multiple frames. When using this coding method, not every frame needs to be saved in full, but only the so called I-frames. Slightly simplified: Other frames is the group (GOP – Group Of Pictures) will reference these frames and save only the parts of the frame that have changed. This method can lower the bit rate drastically but at the same time increase the processing power needed to decode the video. So-called Long-GOP Codecs typically use both compression techniques and some of the most popular ones include H.264 (AVC), H.265 (HEVC) and XDCAM.
Even though Long GOP formats are an amazing technology that has allowed us to send and stream video in amazing quality, it is far from perfect for editing. Though editing with Long GOP footage is possible, it can drastically slow down the process. The best course of action is to convert this footage using a quality intra-frame codec by using Adobe Media Encoder or the ingest workflow in Premiere Pro.
Timeline
An effortless playback of the timeline may sometimes require greater processing power than your computer can offer. This is usually due to the resolution and the codec of the footage used, complexity of the timeline or the amount of effects applied. To fix this issue, you can try some of the following solutions:
Match Sequence Settings to Footage – It is fundamental the you understand the footage and use the correct settings for it in your project. Cutting corners here will most likely result in a decline in the performance or video quality. Setting up a sequence using the correct settings is of great importance here. Matching Sequence Settings to footage is a good way to prevent any potential issues. An easy way to do this is to create a sequence by dragging and dropping a clip into the timeline.
Lower the playback resolution – In order to ease playback of high-resolution footage, Premiere Pro allows you to adjust the playback resolution. The Playback Resolution setting can be found on the right-hand side of the Program Monitor. This setting will only affect the playback. Paused video will still be displayed in full resolution if not changed in the Program Monitor settings under “Paused resolution”. Another step worth noting is to disable High Quality Playback and sacrifice a minimal amount of video quality for better playback performance.

Render the clips – When the play button has been pressed, Premiere Pro will try to play the sequence in the pre-set framerate. Depending on the used footage, sequence settings or effects applied, realtime playback may not be easy or even possible. Rendering the timeline or parts of it will process the clips and save them at the set location for an easier playback in the future. Although simple rendering of clips in the timeline will improve the performance of your playback, it does not automatically improve the export speed. For Premiere to use the rendered previews while exporting, the “Use Previews” function needs to be checked in the Export Settings window. However, this function may lead to degradation of the video quality if the wrong Video Preview settings are set in the Sequence Settings. Another helpful render function, particularly if you are using Dynamically Linked Compositions from After Effects, is the Render and Replace function. It will create a new clip using the chosen settings and replace the linked clip in the timeline. The unrendered clip can be restored at any point.
Mute the effects – If rendering clips takes too long and viewing effects is not necessary whilst editing, Premiere Pro offers an option so that you can ignore all effects in order to speed up your editing process. Navigate to the “+” button in the Program Monitor and turn on the Global FX Mute (“fx” button).

Workflow
Video Technology is constantly developing, regularly delivering new and improved quality standards to the market, but one thing remains the same. In order to edit using these superior quality formats, top-of-the-line computers are required. There is however, an alternative to the end-to-end high-resolution workflow, that allows the production of high-end formats without the need for a powerful editing computer. In this process, a lower resolution version of the footage is created (so called proxies) and used for editing. After the editing, the proxies get replaced with the original footage for colour-grading and further effects before being exported. This process is commonly referred to as offline editing or proxy workflow. If your computer seems to be overstrained by the requirements of your project, you should consider an offline editing workflow.

Proxy workflow in Premiere Pro – Adobe has made offline editing easy and efficient in Premiere Pro. Whilst creating a new project, enable Ingest in the Ingest Settings tab and choose Create Proxies. Alternatively, the same settings can be made in the Media Browser by checking the Ingest box and opening the Ingest Settings. After the setup, all imported clips will automatically be sent to Adobe Media Encoder to be transcoded with the chosen codec whilst you continue working in Premiere. Proxy creation can also be started by right-clicking the selected clips in the Project window and selecting Proxy/Create Proxies. It is recommended that you set the proxy files destination to a specific folder so that all of the proxies are in one place.
After the proxy files have been created, continue the workflow as usual. In the “+” menu of the Program Monitor a button named Toggle Proxies can be found, this button switches the timeline preview between original and proxy files. To continuously enable the Toggle Proxies button, drag it from the “+” menu into the quick access bar in the Program Monitor. Whilst the proxies help to speed up your workflow, they will not affect the export of the sequence, allowing high-quality exports at any point during your workflow.
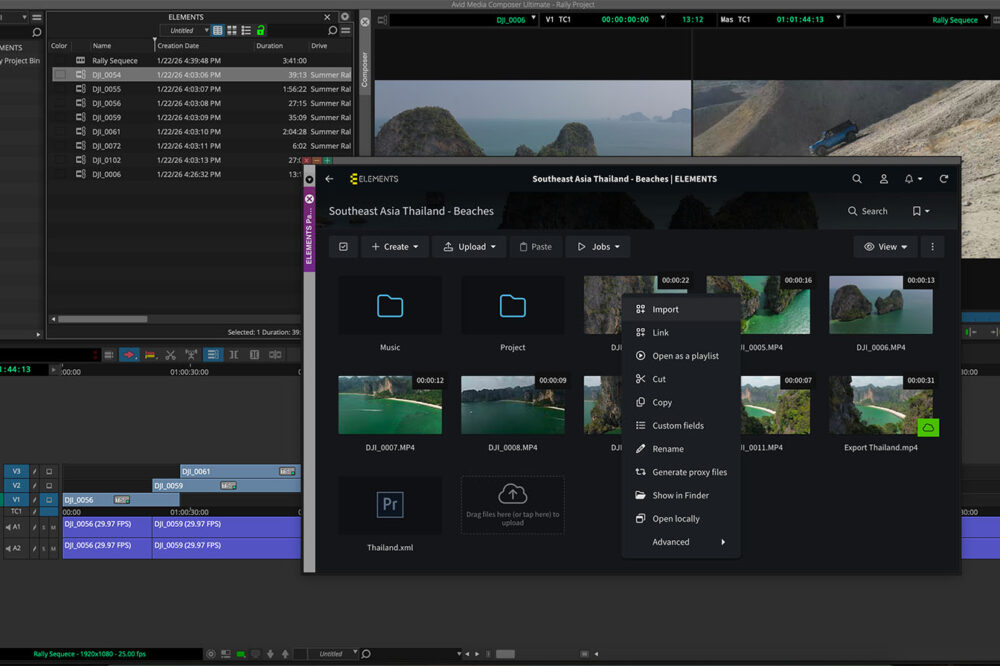
Use the Media Library proxies – ELEMENTS Media Library is a powerful, browser-based Media Asset Management toolbox, perfectly suited to simplify your workflows. Proxy files, generated for displaying the assets in the Media Library can easily be used for editing in Premiere Pro through the ELEMENTS Premiere Plugin.

Media Library has been developed so that it fits perfectly into Premiere Pro based workflows and it offers a two-way communication channel that makes asset-sharing and collaboration easy. The integrated roughcut editor offers every ELEMENTS user the sufficient permissions needed to prepare and pre-cut sequences right from their browser. The roughcut sequences can be imported into Premiere via a simple drag-and-drop or by using the ELEMENTS Premiere Pro Plugin, keeping all the comments and tags made in the Media Library.